Welcome to Microsoft Teams
Microsoft Teams will allow us to work "collaboratively" on the training and keep all your notes synced between your deivces, with whole class and/or with a selected group.
Microsoft Teams can be accessed using a desktop application (Mac and Windows), on android and iOS devices, or by using a browser (Chrome preferred).
The system can be used for:
- Chat - discussing problems, sharing ideas and solutions
- Sharing files and data
- Planning
- Collaborating on projects/documents (but don't copy as I will be using TurnItIn)
Please note that my screenshots below may look slightly different to what you see on the screen for two reasons. The first is because I am using Chrome on a Mac, and the second is because I have 'Teacher' status in the Team.
By now you should have received an invitation to join "BMS3025 Bioinformatics 2018" - if not, let Dr Morris know -
n.j.morris@ncl.ac.uk.
To access the 'Team' either go to the 'Waffle' in
Outlook
and click on it.
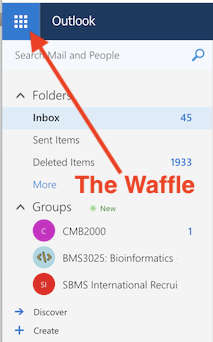
The Waffle
Next, click on 'Teams'
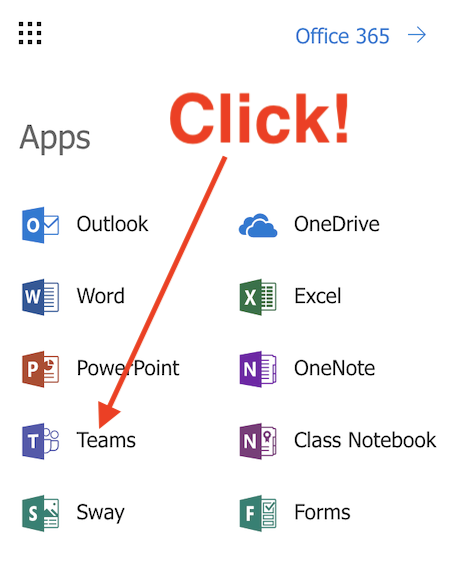
Click on the Teams icon
or use the Desktop application.
If you have successfully joined the 'Bioinformatics Team' your window should look similar to the image below. If you cannot see the 'Bioinformatics Team', then please let Dr Morris know. Please do that now!
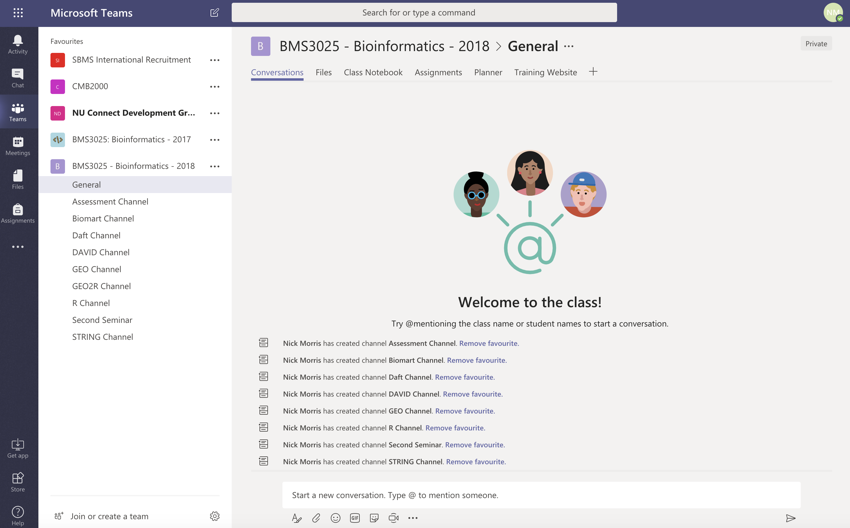
Start screen for Microsoft Teams
Now let's have a look at what is available on the page.
The first area is for conversations. It is chat...

The general chat window
- In the space provided type "Hello World!" (without the quotes) and press Return
You have just sent your first chat message... Hopefully, someone in the Team has replied...
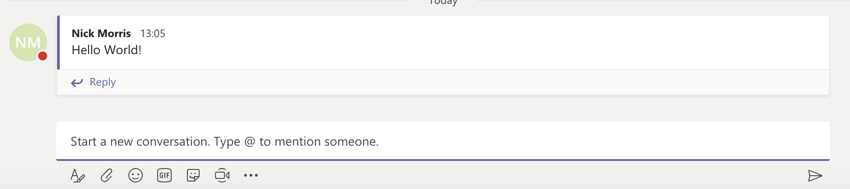
Hello World!
As you can see, just like in any chat application there are lots of things you can add into the chat such as (in order of icon from left to right in the above image):
- expanded compose box for more complex messages
- attachments so you can send files
- Emojis
- animated GIFs
- stickers
- meet now
- messaging extensions
- and far right - send
Along the top of the chat window you will see a series of tabs:

Chat window menus
These tabs do the following:
- Conversations - this tab will return you to the chat section
- Files - this gives an area where anyone can upload files so you can share them and work on them as group (there should be a Word document in Files that you can open and edit online - you can try this later)
- Class Notebook - this links through to a OneNote notebook for the class (more on that in the next section)
- Assignments - here I can put assignment remiders and details.
- Planner - this allows you to plan, share and coordinate work. This is included here to show you the sort of things Microsoft Teams can be used for
- Training Website - this links through to and will display the training website that you are currently using
Other functionality can be added to this menu.
As you can imagine, if there were a large team using this system the main chat window would get very crowded and confused. Therefore, it is possible to set up 'sub-chats' called 'Channels', and I have set up some 'Channels' for this group so you can focus the discussion of specific ideas and problems to specialised areas.
If you look below 'BMS3025: Bioinformatics...' in the lefthand column you should see a series of sub-headings. If the column doesn't look like the next image, then follow the next instructions.
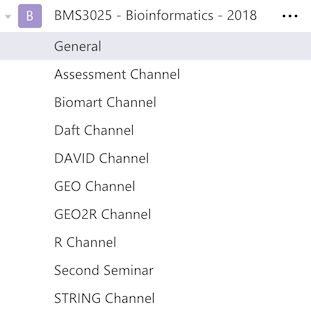
Microsoft Team Channels
- Click on the name of the team 'BMS3025: Bioinformatics...'. The lefthand column should now look like the image above.
So far we have used the 'General' Channel, and this Channel should be used for general discussion and collaboration of project. However, as you can see, I have also set up Channels for:
- Assessment - general discussions and collaboration specific to the assessment (but don't copy)
- Biomart - discussions and collaboration about using Biomart
- Daft - this one is for testing how things work and trying things out
- DAVID - discussions and collaboration about using DAVID
- GEO
 - discussions and collaboration about using GEO
 - GEO2R - discussions and collaboration about using GEO2R
- R - discussions and collaboration about using R
- Second Seminar - discussion about seminar 2
- STRING - discussions and collaboration about using STRING
If you click on each Channel in the list, you will see that the menu along the top of the chat area changes and that there is a chat area for each Channel. In most Channels (except Daft) I have provided, via the menu at the top, links to:
- Conversations - this tab will return you to the chat section for the Channel
- Files - an area where anyone can upload files specific to the Channel so you can share them and work on them as group
- Notes - this links through to specific pages connected to this Channel in the class OneNote notebook (more on this later)
- Training - this links through to the start of the training pages for this particular tool
- Website - this tab takes you to the website of the tool associated with this Channel
In this section, we have looked at how the Microsoft Teams working area is organised and what we can do. Specifically, we have looked at:
- Chat and how this can be used to communicate within the class (no more email!)
- The use of Channels to organise work and projects into manageable chunks
- Different tabs within the Channels and what they are linked to
- How files can be shared for group work
In the next section, we are going to look at OneNote and how that can be used.
You should note that there is a version of Microsoft Teams you can download for your desktop (Mac or Windows) and for your mobile devices (iOS or Android). You can also get OneNote for your desktop (Mac or Windows) or mobile devices (iOS or Android).